Blog

How to Choose Thermal Break Aluminum System Windows?

Choosing Thermal Break Aluminum System Windows requires more than comparing frame colors or glass thickness. Window performance affects comfort, condensation control, energy use, and long-term maintenance. The U.S. Department of Energy reports that windows can account for 25–30% of residential heating and cooling energy use. That figure makes frame design a practical building decision, not merely an architectural detail.

Thermal breaks reduce direct heat transfer through aluminum profiles. They commonly use reinforced polyamide strips between the interior and exterior frame sections. However, the strip alone does not guarantee strong performance. Buyers should examine whole-window U-factor, solar heat gain coefficient, air leakage, water resistance, and tested installation details. The National Fenestration Rating Council emphasizes whole-product ratings, because glass, spacers, seals, and frames operate as one system. Small gaps matter.

Look beyond the brochure.

The International Energy Agency’s Global Status Report for Buildings and Construction identifies buildings as responsible for roughly 30% of global final energy demand. This supports careful window selection, especially in highly glazed offices and homes. Yet reports do not replace site experience. A product performing well in a laboratory may underperform after poor anchoring, damaged gaskets, or incorrect drainage.

A reliable evaluation compares certified test data, thermal-break depth, hardware quality, glazing options, and local climate demands. It should also consider fabrication tolerances and after-sales support. I have seen attractive frames fail because installation details were treated as an afterthought. That mistake is easy to repeat. A thoughtful specification connects measured performance with real walls, real weather, and realistic maintenance expectations.
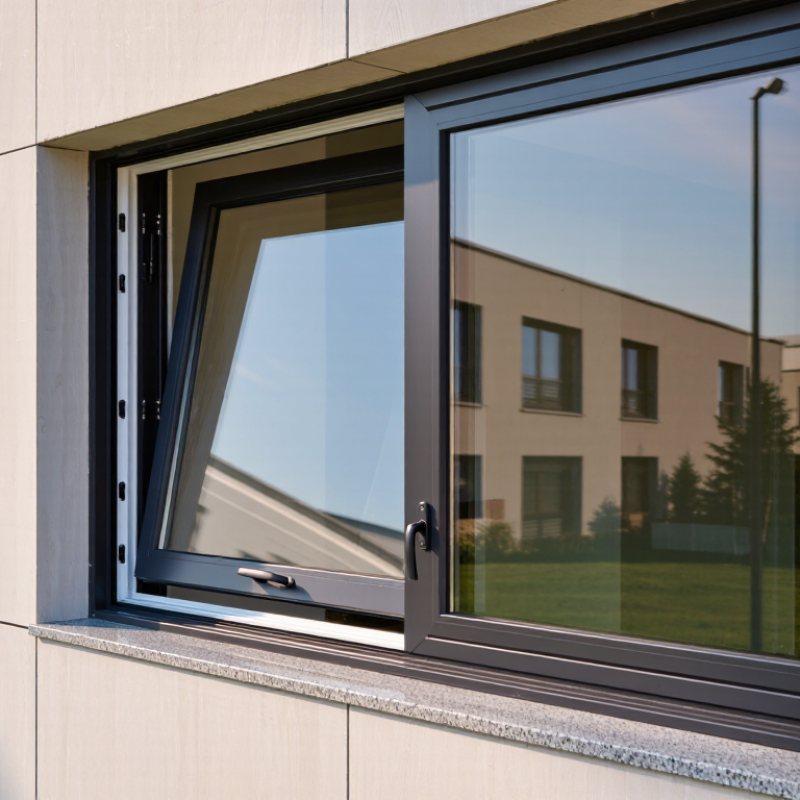
How to Choose Thermal Break Aluminum System Windows?

Understanding Thermal Break Aluminum Window Design

How to Choose Thermal Break Aluminum System Windows?

Understanding Thermal Break Aluminum Window Design

A thermal break window separates indoor and outdoor aluminum sections with an insulating polyamide strip. This interrupts the metal’s heat path. The result is a warmer interior frame and fewer cold surfaces near the glass. In winter, this detail can reduce condensation around the frame. Small gaps matter.

When reviewing a system, inspect the thermal break width, frame depth, and glazing compatibility. A wider insulation strip often improves performance, but design quality still depends on seals and drainage. Low-emissivity glass, warm-edge spacers, and properly compressed gaskets should work together. Ask for tested U-values, air leakage results, water resistance, and wind-load data. These figures are more useful than vague energy claims.

Installation deserves equal attention. The best frame can perform poorly if the opening is uneven or the perimeter seal is incomplete. Check how installers handle corner joints, sill flashing, and expansion movement. Measure twice. In real projects, I have seen minor alignment errors create drafts and difficult operation. That experience changed my preference: I now evaluate the complete window assembly, not the frame alone. A perfect specification on paper may still need revision after site conditions, climate, and building orientation are examined.

How to Choose Thermal Break Aluminum System Windows?

Understanding Thermal Break Aluminum Window Design

How to read the chart: U-value measures heat transfer through the complete window in W/m²·K. Lower values indicate better thermal insulation. Thermal breaks reduce heat flow through the aluminum frame, while low-emissivity coatings, insulated glazing, and warm-edge spacers can further improve performance. Actual results vary with frame geometry, glazing configuration, window size, installation, and testing standards.
Representative industry ranges shown for comparison; project-specific performance should be verified through certified NFRC, EN, or ISO calculations.

Identifying Key Insulation and Energy Efficiency Requirements

Choosing thermal break aluminum system windows starts with insulation targets, not frame appearance. Thermal breaks use polyamide or similar low-conductivity barriers between interior and exterior aluminum. They reduce heat transfer and keep interior surfaces warmer. Ask for the whole-window U-value, not only the center-glass figure. Lower values usually indicate better insulation, but test methods must match. Also check air leakage, water resistance, and solar heat gain coefficient (SHGC). A tight window can still overheat a south-facing room. Climate matters. In cold regions, prioritize low U-values and warm-edge spacers. In hot climates, control SHGC and glass heat gain. Mild climates need a balanced specification.

Glazing often determines the system’s real performance. Double glazing may suit moderate conditions, while triple glazing can improve comfort in severe cold. Low-emissivity coatings and argon filling may reduce radiant and convective heat loss. Their value depends on sealed units, spacer quality, and correct installation. A strong frame cannot rescue a poorly fitted window. Inspect the thermal-break depth, gasket continuity, corner joints, and drainage paths. Ask for independent test reports and documented energy calculations. During a site review, look for cold edges, condensation marks, and uneven seals. Small gaps can create noticeable drafts near a desk or bed. It is easy to overvalue a low U-value. That assumption can fail. Glass area, orientation, shading, ventilation, and local weather all change results. I would compare modeled performance with actual installation details. Specifications sometimes promise more than installers can deliver. Leave room for that uncomfortable question.

How to Choose Thermal Break Aluminum System Windows? - Identifying Key Insulation and Energy Efficiency Requirements

Evaluation Dimension Key Requirement or Target Recommended Selection Guidance Why It Matters Relevant Test Method or Reference
Whole-Window U-Factor Prefer approximately ≤ 1.6 W/m²·K for energy-conscious projects; ≤ 1.3 W/m²·K for colder climates; high-performance designs may target ≤ 0.8 W/m²·K. Compare the complete window assembly, including frame, glass, spacer, sash, and operating hardware—not the center-of-glass value alone. A lower U-factor means less heat transfer through the window and generally improves heating efficiency and interior surface temperature. ISO 10077-1/-2; EN 14351-1; NFRC 100 where applicable.
Thermal-Break Design Use a continuous, low-conductivity separator between interior and exterior aluminum sections. Polyamide thermal barriers are commonly designed in approximately 20–35 mm widths, depending on the system. Confirm that the thermal barrier is continuous around the frame and sash, mechanically secure, and not interrupted by unnecessary metal bridges. The thermal break reduces conductive heat flow through aluminum and helps limit cold interior frame surfaces and condensation risk. Review system cross-sections and calculated thermal-performance reports under ISO 10077 or an equivalent method.
Glazing Configuration Double glazing is a practical baseline; triple glazing can provide lower U-factor where climate, frame depth, weight, and budget allow. For cold climates, consider low-emissivity coatings, an inert-gas cavity, warm-edge spacers, and an appropriate cavity width as a tested combination. Glass commonly represents the largest area of a window, so its thermal properties strongly affect whole-window performance. EN 673; ISO 10292; ISO 10077-1/-2.
Solar Heat Gain Coefficient Select a lower SHGC, commonly about 0.25–0.40, for cooling-dominated or highly exposed façades; higher values may benefit passive solar heating in cold climates. Evaluate orientation, shading, glazing area, local climate, and cooling loads rather than choosing the lowest available value for every elevation. SHGC indicates how much incident solar radiation enters the building. The correct value can reduce overheating or support useful winter solar gains. ISO 9050; NFRC 200 where applicable.
Visible Transmittance A visible transmittance of approximately 0.45–0.70 is common for clear or moderately coated insulating glass, depending on coating and glass composition. Balance daylight requirements with solar-control needs; verify the value for the exact glass make-up and coating. Higher visible transmittance can improve daylight availability, while heavily tinted or reflective glass may reduce glare and solar gain. ISO 9050; NFRC 200 where applicable.
Air Leakage Use the lowest tested leakage class practical for the project; a common high-performance benchmark is ≤ 0.3 m³/h·m² at 75 Pa, subject to the applicable product standard. Prioritize compression seals, accurate corner fabrication, multi-point locking, and proper installation tolerances. Uncontrolled air leakage can increase heating and cooling demand, create drafts, and transport moisture into the wall or frame assembly. EN 1026 and EN 12207; ASTM E283 where applicable.
Water Tightness Select a water-tightness classification suitable for the building height, exposure, wind-driven rain, and façade location; higher classes are preferable for exposed elevations. Check drainage paths, pressure-equalized chambers, sill design, corner joints, and compatibility with the surrounding wall system. Water penetration can damage finishes, insulation, and adjacent construction even when the window itself appears thermally efficient. EN 1027 and EN 12208; ASTM E331 where applicable.
Condensation Resistance Prefer a warm interior frame and edge-of-glass temperature above the project’s calculated dew-point condition; use a project-specific condensation analysis where humidity is high. Review thermal-bridge calculations at frame corners, glazing edges, mullions, transoms, fasteners, and connections to the wall. Reducing surface condensation helps protect finishes and lowers the risk of persistent moisture-related problems. ISO 10077-2; ISO 10211; project-specific hygrothermal assessment.
Frame-to-Wall Installation Use a continuous installation strategy with interior air sealing, insulated perimeter gaps, and exterior water-shedding protection. Specify compatible tapes, membranes, backer rods, sealants, and low-expansion insulation; avoid relying on sealant alone for air and water control. Poor installation can significantly reduce the real-world performance of an otherwise well-designed thermal-break window. Follow the applicable building code, façade design standard, and tested installation details.
Acoustic Performance Specify the required sound insulation rating based on site noise; laminated glass and dissimilar pane thicknesses can improve acoustic performance. Request tested sound-reduction data for the complete window, not glass-only data, and consider frame, seals, vents, and installation joints. Thermal efficiency does not automatically guarantee adequate noise control, particularly near traffic or aviation sources. ISO 10140; ISO 717-1; ASTM E90 where applicable.
Structural and Durability Requirements Confirm resistance to design wind pressure, operating cycles, impact, corrosion, and expected temperature movement for the project location. Verify maximum sash size, glass weight limits, mullion deflection, hardware capacity, drainage, and finish durability before final selection. A thermally efficient system must also remain airtight, watertight, and operable throughout its service life. EN 12210; EN 1191; applicable local structural and corrosion standards.
Documentation and Verification Require project-specific performance data, drawings, glass specifications, thermal calculations, test reports, and installation instructions. Compare identical configurations and confirm whether reported values apply to the selected size, opening type, glass package, and hardware. Transparent documentation prevents misleading comparisons based on unverified frame-only or center-of-glass figures. Third-party laboratory reports, CE/DoP documentation where applicable, and local code compliance records.

Note: Performance targets are general selection guidelines. Final requirements should be confirmed through the applicable local energy code, climate analysis, orientation study, structural calculations, and tested performance of the complete window assembly.

Comparing Frame Profiles, Glass Options, and Hardware Features

How to Choose Thermal Break Aluminum System Windows?

Frame profiles set the foundation for thermal performance. A thermal break separates interior and exterior aluminum with a low-conductivity polyamide barrier, reducing heat transfer and interior condensation. Compare profile depth, cavity design, wall thickness, and drainage paths, not appearance alone. The U.S. Department of Energy reports that windows can cause 25–30% of residential heating and cooling energy use. That figure makes profile selection practical, not cosmetic. I have seen slim frames perform poorly when their thermal barriers were interrupted around corners.

Glass choices should match the climate and room orientation. Double glazing with a low-emissivity coating and argon filling often balances cost and insulation. Triple glazing can improve comfort in colder regions, but it adds weight and demands stronger hardware. Check whole-window U-factor, solar heat gain coefficient, visible transmittance, and air leakage. The National Fenestration Rating Council explains that its labels evaluate the complete window assembly, rather than glass alone. A lower U-factor is not automatically better everywhere. Excessive solar control can make a shaded room feel unnecessarily dark.

Hardware affects daily reliability. Select multipoint locks, corrosion-resistant rollers, adjustable hinges, durable seals, and positive drainage. Ask for independently verified air, water, and wind-load test results. The American Architectural Manufacturers Association testing framework commonly evaluates these operating conditions. Small details matter. A stiff handle may indicate alignment problems, not security. I would also question vague cycle-life claims; hardware can look impressive in a showroom and disappoint after seasonal movement. Recheck installation tolerances, because even a strong thermal break cannot correct a poorly sealed perimeter.

Evaluating Climate Performance, Safety, and Installation Compatibility

How to Choose Thermal Break Aluminum System Windows?

Climate performance should guide the window selection, not frame appearance alone. The U.S. Department of Energy reports that windows can cause 25–30% of residential heating and cooling energy use. Thermal break aluminum frames reduce conductive heat transfer through an insulating barrier between interior and exterior metal. However, the frame is only one part of the system. Check the National Fenestration Rating Council ratings for U-factor, solar heat gain coefficient, air leakage, and visible transmittance. In hot climates, a lower SHGC can limit afternoon heat near west-facing glass. In colder regions, a lower U-factor helps retain indoor warmth. Tiny differences matter.

Safety & Installation Compatibility Safety and installation compatibility require equal attention. Use laminated or tempered glazing where impact, fall, or breakage risks exist, and confirm compliance with local building requirements. The International Building Code and regional safety standards may require specific glass types near doors, stairs, and low sill heights. Before ordering, verify rough-opening dimensions, drainage paths, structural loads, fastener locations, and sealant compatibility. The U.S. Department of Energy notes that poor installation can undermine otherwise efficient windows. Field experience supports this: a small gap around the frame can create drafts, water intrusion, and movement noise. I have found that drawings often look perfect, but existing walls rarely do. Allowing adjustment space is wiser than forcing a rigid fit.

Selecting a Reliable Manufacturer and Verifying Product Quality

Choosing thermal break aluminum windows starts with the manufacturer, not the frame color. Ask for a factory address, production photos, and recent third-party test reports. The U.S. Department of Energy reports that windows can cause 25–30% of residential heating and cooling energy use. A reliable supplier should therefore provide whole-window U-factor, solar heat gain coefficient, air leakage, and water resistance data. Frame-only claims are incomplete.

Request reports based on recognized testing methods, such as NFRC procedures, AAMA/WDMA/CSA 101 standards, or equivalent local standards. Check the test sample size, glazing type, hardware, and thermal-break material. A 30 mm polyamide strip sounds impressive, but it cannot guarantee performance alone. Installation details matter. Look for corner construction, gasket quality, drainage paths, and thermal bridge calculations. The International Energy Agency’s 2024 buildings report identifies buildings as responsible for about 30% of global final energy use, making these details commercially important.

Visit the factory if possible. Watch whether staff inspect profiles, seals, glass, and finished corners, rather than merely packing products. Ask for batch traceability and warranty conditions in writing. Samples can be excellent while mass production varies. I would question any supplier that refuses independent verification. Even certified windows may perform poorly after careless installation. That is the uncomfortable part. Review references from similar climates, compare measured results, and leave room for honest uncertainty.